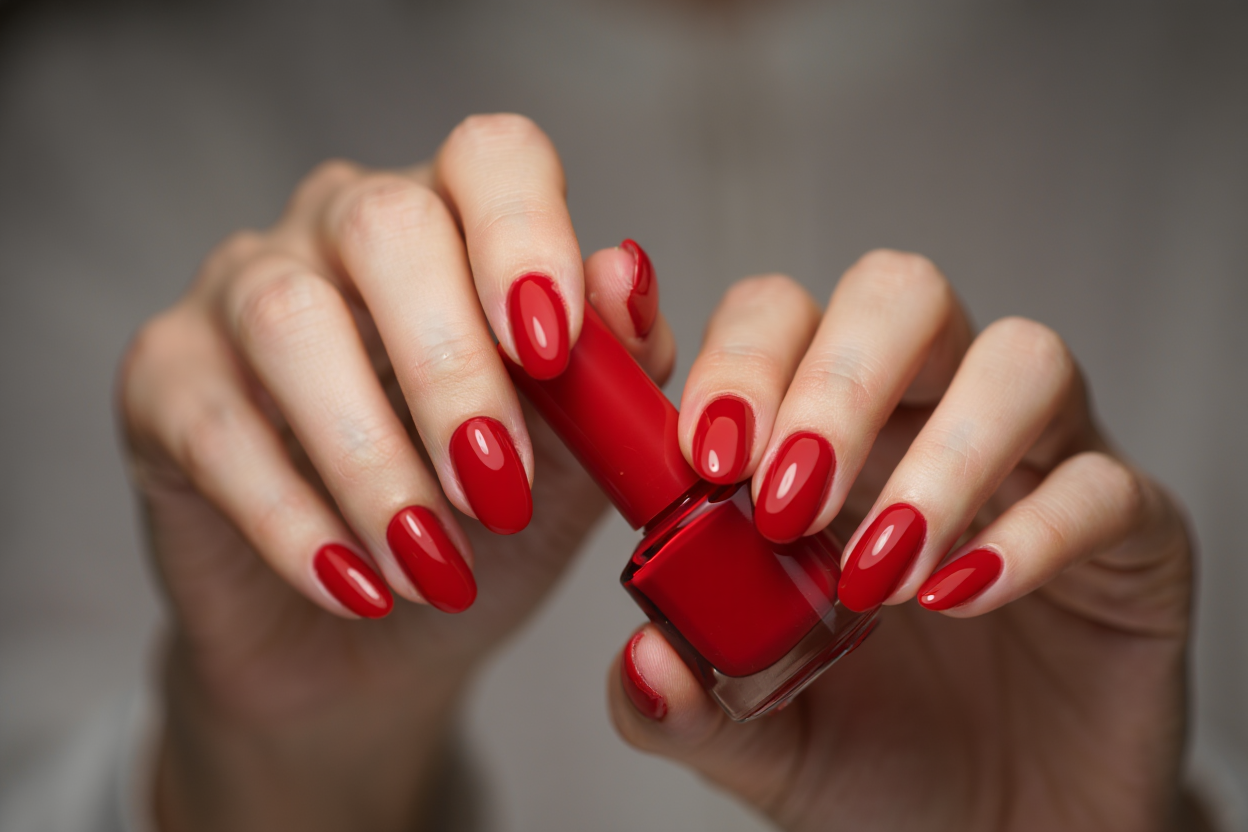
Getting a perfect manicure only to see it chip the next day is a common frustration. Many people wonder how to make that fresh-from-the-salon look endure. The secret to durable, beautiful nails is not just about the polish you choose. Its success hinges on a complete process, from preparation to aftercare. Achieving long lasting manicures means creating a finish that withstands daily wear and tear for a week or more.
This guide breaks down the practical steps to make your nail color last. It covers everything from nail prep and base coats to application techniques and sealing methods. You will learn the best practices for drying and protecting your nails. Read on for our detailed guide, and at the end, don’t forget to download our free, printable checklist to keep these tips handy!

Prepping your nails properly
A flawless finish doesn’t start with the first swipe of color. Instead, proper preparation stands as the most critical step for achieving long lasting manicures. When the nail surface is clean, smooth, and dry, the polish can adhere correctly. Overlooking this foundational stage is why many home manicures fail quickly. Think of it like painting a wall; you would never apply paint to a dirty or uneven surface. The same principle applies to your fingernails for a durable result. Excellent prepping nails is one of the most vital manicures at home tips.
The Foundation of Flawless Nails
The goal of prepping nails is to create an optimal canvas. This involves removing old polish completely and tending to your cuticles. It also includes shaping and buffing the nail plate. Each action contributes to a stronger bond between your nail and the base coat. Taking time here prevents lifting and chipping later on. A pristine surface ensures no oils or residues interfere with adhesion. This level of detail in prepping nails directly translates into how long your manicure will look its best.
For a successful session, you will need a few essential tools. Having the right equipment makes the process easier and more effective.
- A gentle, acetone-free nail polish remover
- A soft cuticle pusher or an orangewood stick
- Cuticle remover solution or oil
- A fine-grit nail file (220-grit or higher)
- A smooth buffing block
A Step-by-Step Guide to Perfect Prep
Start by thoroughly removing any old polish with a non-acetone remover. These formulas are less harsh and do not excessively strip the nail of its natural moisture. Next, apply a cuticle remover to the base of each nail. Let it sit for the recommended time before gently pushing your cuticles back. Avoid cutting your cuticles, as they serve to protect your nail bed from bacteria. This careful stage of prepping nails is a cornerstone of nail care.
After managing your cuticles, it is time to shape. Use a fine-grit file to gently form the nail, always moving the file in one direction. A back-and-forth seesaw motion can cause splitting and weaken the structure. Once you are happy with the shape, lightly buff the nail surface. This removes any natural oils and creates a slightly porous texture for the polish to grip. Finally, wipe each nail with rubbing alcohol on a lint-free pad. This last step dehydrates the nail plate, ensuring a perfectly clean surface for the base coat. This is a key technique for how to make manicure last longer.
A clean, dry, and oil-free nail plate is the non-negotiable foundation for any long-lasting manicure.
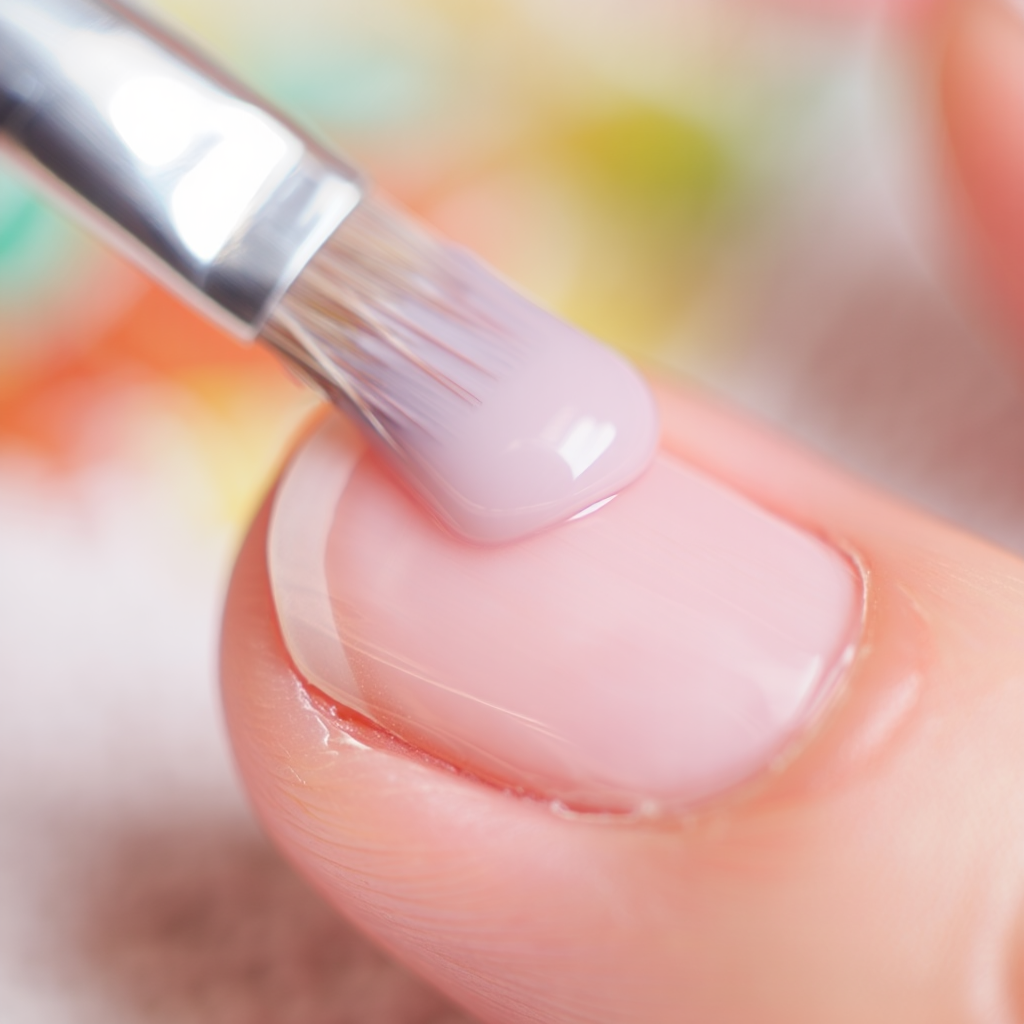
Proper base coats & underlayers
Think of the base coat as the unsung hero of a durable manicure. It functions like double-sided tape, gripping both your nail plate and the polish. It also creates a barrier that prevents dark lacquers from staining your natural nails. Many people skip this step to save time, but that is a crucial mistake. A quality base coat is essential for long lasting manicures. It fills in ridges, creating a smooth surface for an even color application. This simple layer can add days to the life of your manicure.
Why You Should Never Skip the Base Coat
Applying polish directly to a bare nail is a recipe for quick chipping. Natural nails produce oils that prevent polish from adhering as it should. A base coat is formulated to bond securely to the nail plate. Research published in Skin Appendage Disorders (2020, Switzerland) demonstrated that nails can absorb a significant amount of water. This swelling and shrinking from water exposure stresses polish, but a good base coat adds a protective, flexible layer that mitigates this damage. It provides the elasticity needed to prevent cracks. This is a vital piece of advice for how to make manicure last longer.
Choosing the Right Formula for Your Nails
Not all base coats offer the same benefits. You should choose one based on your specific nail concerns. If you have brittle nails, a strengthening base coat infused with proteins can provide support. For nails with noticeable ridges, a ridge-filling base coat creates a perfectly smooth canvas. For those who change their polish often, a peel-off base coat might be an option, though it is not designed for longevity. A “sticky” base coat, often called a rubberized base coat, offers superior adhesion. It remains slightly tacky to create an exceptional grip for the color coats that follow.
“The health of your nails is the canvas for your manicure. A nourishing base coat not only helps the polish last but also protects and strengthens the nail underneath.” – Deborah Lippmann, Celebrity Manicurist
Choosing the correct formula is one of the most effective manicures at home tips. Taking a moment to assess your nail health before application can make a huge difference. For general use, a standard sticky base coat is an excellent choice for extending wear time. This simple selection can greatly improve your results with long lasting manicures.
Technique of applying polish
How you apply nail polish dramatically affects its durability. Rushing the process or applying coats that are too thick leads to a weak finish. Patience and precision are your allies for a manicure that endures. The goal is to build thin, even layers that cure fully. This creates a strong, chip-resistant coating. Mastering the application is fundamental if you want to understand how to make manicure last longer. It is a skill that improves with practice.
The Three-Stroke Method Explained
Professional manicurists often use the three-stroke method for perfect coverage. After wiping excess polish from the brush, place a bead of lacquer in the center of your nail, slightly away from the cuticle. Push the brush gently toward the cuticle, leaving a tiny gap. Then, pull the brush straight down the center to the nail tip. Return to the starting point and paint one stroke down the left side. Finish with a final stroke down the right side. This technique ensures full coverage without flooding the cuticles.
Thin Coats vs. Thick Coats
Applying thin coats of polish is one of the most important manicures at home tips. Thick layers take much longer to dry and are more susceptible to smudging and bubbling. While it may seem faster to apply one thick coat, it creates a soft, gummy layer that never truly hardens. Two to three thin coats are much stronger and more durable. Allow each layer to dry for at least two to three minutes before applying the next. This lets each layer set properly, contributing to a solid, resilient finish. This technique is vital for long lasting manicures.
| Feature | Thin Coats (2-3 layers) | Thick Coats (1-2 layers) |
| Drying Time | Faster per coat; slightly longer total time | Extremely slow; often never cures fully |
| Durability | High; flexible and chip-resistant | Low; prone to smudges, dents, and chips |
| Appearance | Smooth, even, and professional | Streaky, bubbly, and often uneven |
| Adhesion | Excellent bond to the base coat and nail | Poor bond; prone to peeling in sheets |
Two or three thin, even coats of polish will always outperform one thick, goopy layer in both appearance and durability.
A common question is why polish sometimes bubbles. Bubbles are usually trapped air, often caused by shaking the polish bottle. Instead of shaking, gently roll the bottle between your palms to mix the contents. Applying lacquer in a drafty or hot area can also cause the solvents to evaporate too quickly, trapping air and forming bubbles. Careful application is essential for a beautiful outcome.

Topcoat & sealing edges
A topcoat is the armor for your manicure. It provides a protective barrier against scratches, chips, and daily wear. This layer also adds a high-gloss shine that makes your color look vibrant. Without a topcoat, your polish is exposed and vulnerable. Applying it correctly is just as important as the product you choose. This final layer is a non-negotiable part of achieving long lasting manicures. There are many topcoat tips that can elevate your results.
The Protective Shield for Your Polish
A good topcoat does more than just add shine. It contains ingredients that form a hard, durable shield over your polish. A comparative analysis in the International Journal of Cosmetic Science (2021, South Korea) examined different topcoat formulations. It found that those with methacrylate copolymers provided superior resistance to micro-scratches from daily activities. This protection keeps your manicure looking fresh for days longer. Reapplying the topcoat every two to three days can further extend its life. This is one of the best topcoat tips for maintaining your manicure.
Different topcoats offer different benefits. Understanding them helps you choose the right one for your needs.
- Quick-Dry Topcoats: These are popular for their convenience but can sometimes cause shrinkage if applied over wet polish.
- Plumping Topcoats: These give a gel-like, high-volume finish without needing a UV lamp.
- Matte Topcoats: These provide a non-shiny, modern finish while still offering protection.
- UV-Protective Topcoats: These prevent your nail color from fading or yellowing due to sun exposure.
Mastering the Art of Sealing
“Capping the free edge” is a professional technique that makes a huge difference. This means running the topcoat brush along the very tip of your nail. This action seals the most vulnerable part of the manicure, where chipping often begins. It creates a complete seal around the polish, defending it from water and impacts. This simple motion is one of the most effective topcoat tips you can learn. It is a crucial step for how to make manicure last longer.
Here is a simple guide to sealing the edge for a perfect finish.
Step-by-Step Guide to Sealing the Nail Edge
- After applying your final color coat, wait about two minutes.
- Apply your chosen topcoat using the three-stroke method, covering the entire nail surface.
- Before the topcoat dries, take the brush with a small amount of product on it.
- Gently swipe the brush horizontally along the thin, cut edge of your nail tip.
- Allow the topcoat to dry completely without touching anything.
This technique, combined with a quality product, provides a significant advantage. It is a small detail that delivers big results for long lasting manicures. Mastering these topcoat tips will change your at-home manicure game.
Drying & curing best practices
That window of time after applying the final topcoat is incredibly delicate. This is when your manicure is most vulnerable to smudges, dents, and imperfections. Proper drying, or curing, is the process of the polish solvents evaporating so the layers harden completely. Many common “hacks” for speeding up this process can actually do more harm than good. Understanding the right way to let your nails dry is essential for long lasting manicures. It requires patience, but the payoff is a flawless, durable finish.
The Waiting Game: How to Dry Nails Effectively
True drying takes much longer than most people think. While nails might feel dry to the touch in 15-20 minutes, the polish is not fully cured for several hours. Some experts even suggest it can take up to 24 hours for all layers to harden completely. During this time, be mindful of your activities. Avoid tasks like washing dishes, opening cans, or rummaging through a purse. The best approach is to apply your polish when you have ample time to relax and let it set.
“One of the biggest mistakes people make is not waiting long enough for their nails to dry. Cold air is your best friend. A fan on a low, cool setting helps the solvents evaporate evenly without creating bubbles.” – Tom Bachik, Celebrity Nail Artist
Using quick-dry drops or sprays can be helpful. These products work by absorbing the solvents from the top layer of polish, making it feel dry faster. However, the layers underneath still require time to cure. They are a good solution for preventing immediate smudges but do not replace careful waiting. This is one of the more practical manicures at home tips.
Myths About Quick-Drying Methods
There are many myths about how to speed up nail drying. One popular but harmful myth is dipping nails in ice water. The cold shock may make the top layer feel hard, but it stops the solvents underneath from evaporating properly. This can trap moisture and lead to a manicure that feels hard on the surface but remains soft and dentable underneath.
Another common mistake is using heat, like from a hairdryer. Warmth actually keeps the polish soft and prevents it from curing correctly. It can also cause bubbling as the solvents try to escape too quickly. The best environment for drying polish is cool, dry air. Patience is the most reliable tool for achieving a perfectly cured, long lasting manicures result at home. Understanding how to make manicure last longer involves knowing what not to do.
Protecting nails in daily tasks
After your manicure is perfectly dry, the challenge shifts to protecting it from the rigors of daily life. Everyday chores and habits can quickly turn a beautiful set of nails into a chipped mess. Being mindful of how you use your hands is crucial for extending the life of your polish. Simple adjustments to your daily routine can make a significant difference. Protecting your nails is just as important as the application itself for long lasting manicures. It is a continuous effort.
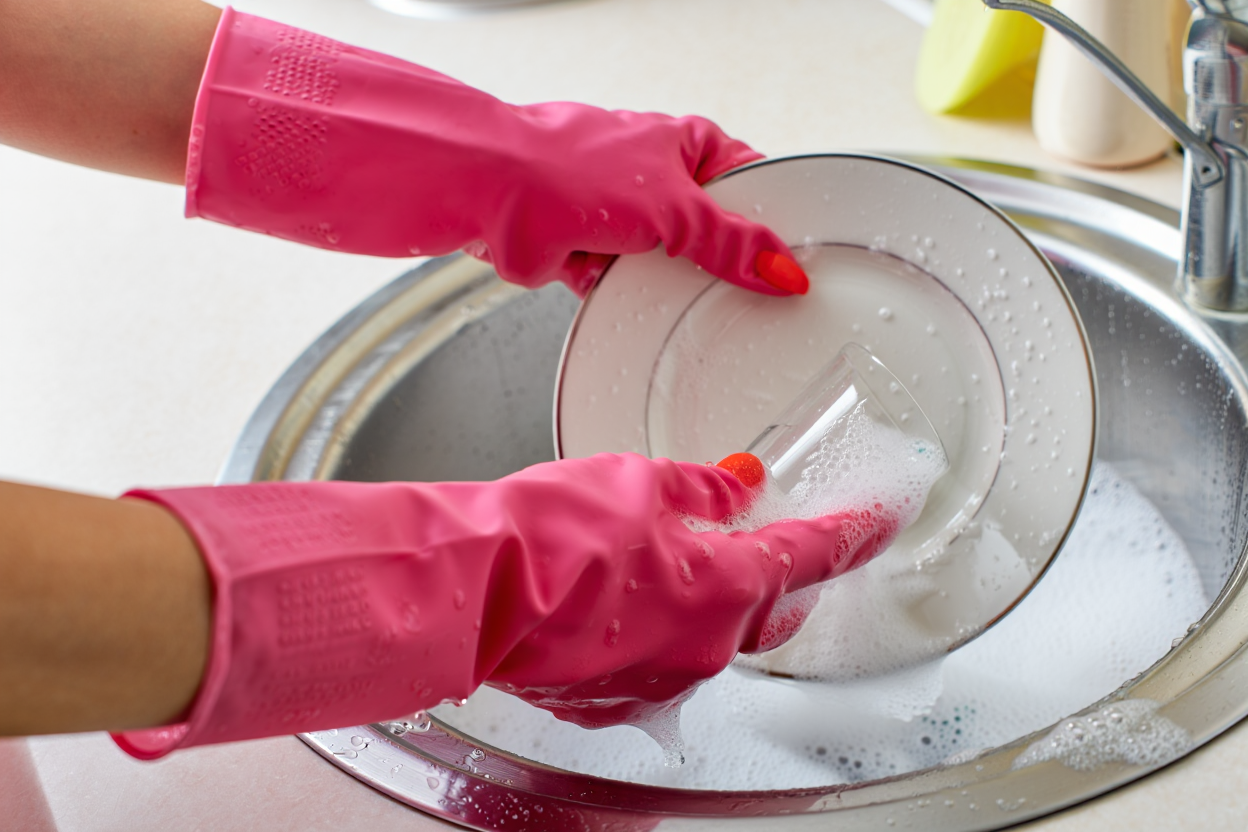
Everyday Habits that Ruin Your Manicure
Many common activities are enemies of a fresh manicure. Washing dishes without gloves is one of the worst offenders. Prolonged exposure to hot water and harsh detergents causes the nail to expand and the polish to lift. Using your nails as tools to open cans, scrape off labels, or type aggressively also leads to chips and breaks. Even applying certain lotions or using hand sanitizer can affect the topcoat. The Journal of the American Academy of Dermatology published a study (2019, USA) which found that alcohol-based hand sanitizers can degrade the polymer structure of topcoats, leading to a loss of shine and durability.
Simple Swaps for Nail Protection
Protecting your manicure does not require a drastic lifestyle change. It just takes a little awareness. Always wear rubber gloves when cleaning or washing dishes. Use the pads of your fingers for typing instead of the tips of your nails. Keep a tool handy, like a letter opener, for tasks that might tempt you to use your nails.
After washing your hands, dry them thoroughly and apply a nourishing cuticle oil. This keeps the surrounding skin and the nail itself hydrated and flexible. Remember that environmental factors also play a huge role; caring for your nails in summer heat versus winter cold requires different approaches to maintain their health and the life of your manicure. The best prepping nails starts with healthy hands.
Treat your nails like jewels, not tools. This mindset is the key to preserving your manicure and nail health.
These simple protective measures are fantastic manicures at home tips. By making them a habit, you create an environment where your manicure can thrive. A little bit of care goes a long way in achieving beautiful, long lasting manicures. Taking these precautions is a simple answer to how to make manicure last longer.
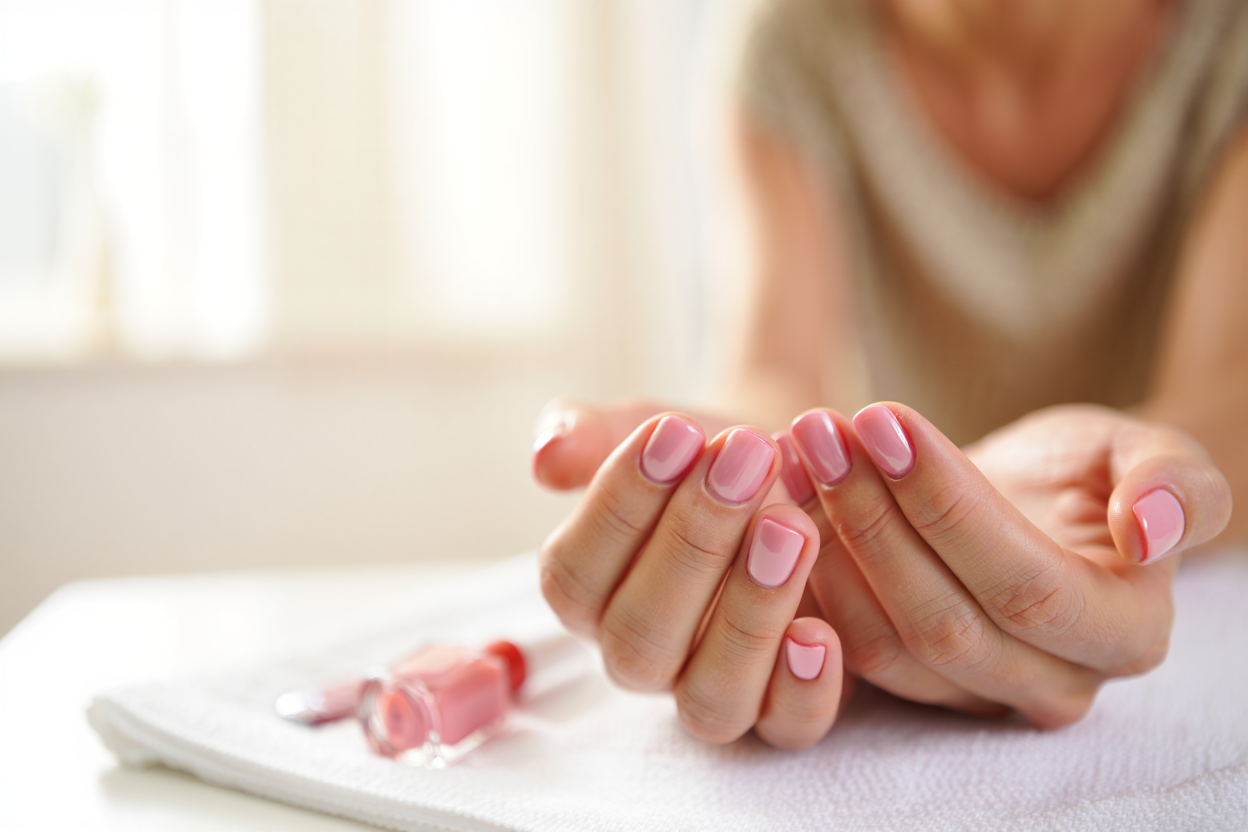
Touch-up & maintenance tips
Even with perfect prep and application, life inevitably happens. A minor chip or some dulling of the shine does not mean your manicure is ruined. With a few simple techniques, you can perform quick repairs and maintain the fresh look of your nails. Regular maintenance can easily add several more days of wear. These final manicures at home tips will help you get the most out of your efforts. They are essential for ensuring consistently long lasting manicures.
Fixing Chips and Smudges Like a Pro
When a chip occurs, do not peel the rest of the polish off. You can easily fix it. First, gently buff the chipped area with a smooth buffing block to even out the edges. If the chip is small, you can dab a tiny amount of the same color polish into the gap. If it is larger, apply a thin layer of color over the patched area and slightly beyond to blend it. Wait for it to dry completely.
After the patch is dry, apply a fresh layer of topcoat over the entire nail. This will smooth out the surface and make the repair virtually invisible. What if you smudge a nail that is still wet? A popular trick is to use a tiny drop of nail polish remover to smooth the surface. Gently pat the smudged area with the tip of another finger dipped in remover to re-liquefy and even out the polish. Once it looks smooth, let it dry and cover it with a topcoat. This is an advanced technique for how to make manicure last longer.
When to Refresh Your Topcoat
One of the best ways to maintain your manicure is to reapply your topcoat every two to three days. This simple step adds a fresh layer of protection and restores the high-gloss shine. It helps to seal the edges again and fills in any microscopic scratches that have appeared. This proactive approach is a core principle of achieving long lasting manicures.
“Cuticle oil is your manicure’s best friend. Hydrated cuticles prevent hangnails and keep the nail plate flexible, which reduces chipping. Apply it daily, especially at night.” – Jin Soon Choi, Celebrity Manicurist & Founder of JINsoon
By combining quick repairs with regular topcoat refreshing, you can significantly extend the life of your manicure. These maintenance habits are easy to incorporate into your routine. They ensure your nails look their best from one full manicure to the next.
FAQ
How can I prevent my nails from peeling in layers?
Peeling nails, also known as onychoschizia, is often a sign of dryness. To combat this, keep your nails and cuticles hydrated. Use a quality cuticle oil daily and apply a hand cream regularly. Avoid soaking your hands in water for long periods. When filing, always move the tool in one direction with a fine-grit file. You may also benefit from a strengthening base coat designed to bond the nail layers together. This proper prepping nails technique helps a lot.
Why does my nail polish look streaky after application?
Streakiness can be caused by a few factors. Applying polish too thickly is a common cause. Always opt for two to three thin, even coats. Make sure your brush has the right amount of polish—not too much, not too little. The three-stroke application method can also help ensure even coverage. Finally, using old or thick polish can lead to a streaky finish. If your polish has thickened, you can add a few drops of nail polish thinner, not remover.
What’s better for regular polish: a quick-dry topcoat or a regular one?
This depends on your priority. A quick-dry topcoat is excellent for preventing immediate smudges and is very convenient. However, some formulas can cause shrinkage, pulling the polish away from the edges as they dry. A regular topcoat may take longer to dry but often provides a more durable, flexible finish that is less prone to chipping in the long run. For maximum longevity, a high-quality regular topcoat is often the better choice. Following these topcoat tips can extend wear.
For the best tips on achieving a long-lasting manicure at home, watch this video by CutePolish. It covers nail preparation, base and color application, as well as the importance of topcoat and sealing nail edges. The video offers practical techniques to make your manicure stay beautiful and chip-free for longer.
Conclusion
Creating long lasting manicures at home is entirely achievable with the right knowledge and techniques. It is a process that gives you control over the health and beauty of your nails. From meticulous prepping nails to the final, protective topcoat, each step plays a vital role. By using thin coats, sealing the edges, and allowing for proper drying time, you build a resilient and beautiful finish.
Protecting your nails from daily hazards and performing minor touch-ups will ensure your hard work pays off. The manicures at home tips outlined here are trusted by professionals and proven to work. Embrace these practices, and you will enjoy flawless, salon-quality results that endure. Try these methods for your next manicure and see the remarkable difference for yourself.
To make these steps even easier to follow, we’ve created a comprehensive checklist. Print it out and keep it with your manicure kit to ensure you never miss a crucial step for achieving flawless, long lasting manicures at home.