A cracked or peeling nail looks small, but it can derail daily tasks. It snags on fabric, hurts when typing, and chips again after trimming. Many people search for how to treat damaged nails when breakage keeps returning. In this guide, that phrase means a step-by-step plan to rebuild strength, restore flexibility, and prevent new trauma. The playbook below lays out causes, signs, home fixes, salon options, nutrients, tools, and red flags. Each section builds a practical path that anyone can follow without guesswork. At the end of this guide, grab a printable A4 checklist to keep by your sink and track nail recovery day by day.
Common causes of nail damage
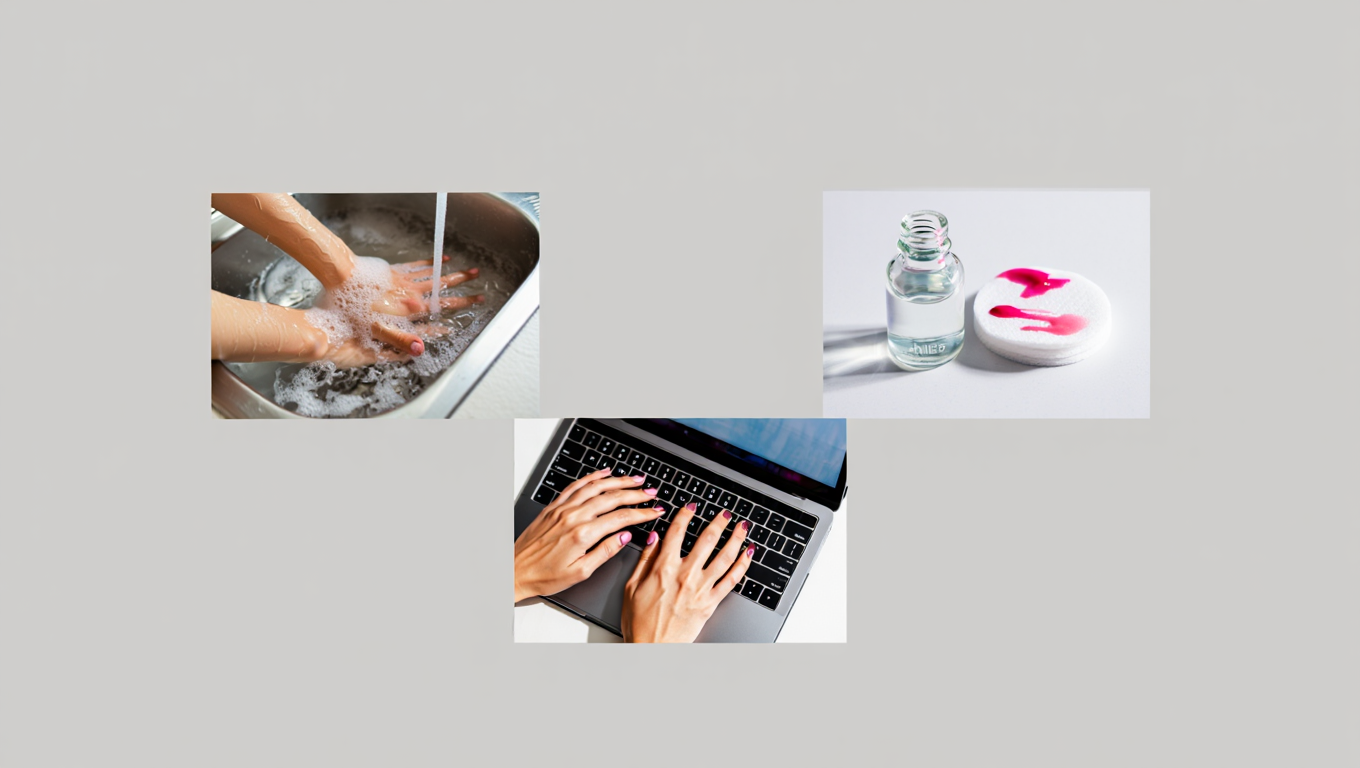
Nails rarely fail for one reason. Repeated wetting and drying swells and shrinks the nail plate. That cycle weakens layers and invites peeling. Strong solvents dehydrate keratin and roughen edges. Physical trauma from typing or sports chips corners and starts splits. A reliable damaged nails treatment plan begins by removing the stressors that started the cycle.
Why root causes matter
Breaking stops only when triggers change. Water exposure softens keratin and makes it bend. Acetone and alcohol strip natural oils that lock in moisture. Harsh files saw away protective layers and leave jagged rims. Gloves, gentle removers, and fine-grit tools reduce repeated harm and speed brittle nails recovery.
“To prevent a nail injury, I tell patients to keep nails short, so they do not bend or catch on objects,” says Shari Lipner, MD, PhD, FAAD.
Practical steps to remove triggers
Switch dish duty to gloves with cotton liners. Shorten nails to a rounded oval to avoid corner tears. Replace aggressive buffers with a 240- to 320-grit file. Use acetone only when necessary, and limit contact time. Between polishes, give nails a full rest period to enable nail repair. This steady approach also clarifies how to treat damaged nails in daily life.
Anticipated questions
Many wonder if gel manicures cause permanent harm. The coating itself is not the only problem. The removal and buffing are the bigger culprits. Sunscreen or UV-blocking gloves help during curing, and spacing appointments reduces cumulative stress. Dermatology guidance also suggests skipping cuticle trimming to support natural defense and better cuticle care.
A short takeaway: start by reducing water, solvents, and friction. That change alone makes hydration for nails products work much better.
Keep nails short, rounded, and protected from water and solvents to stop the damage cycle before it starts.
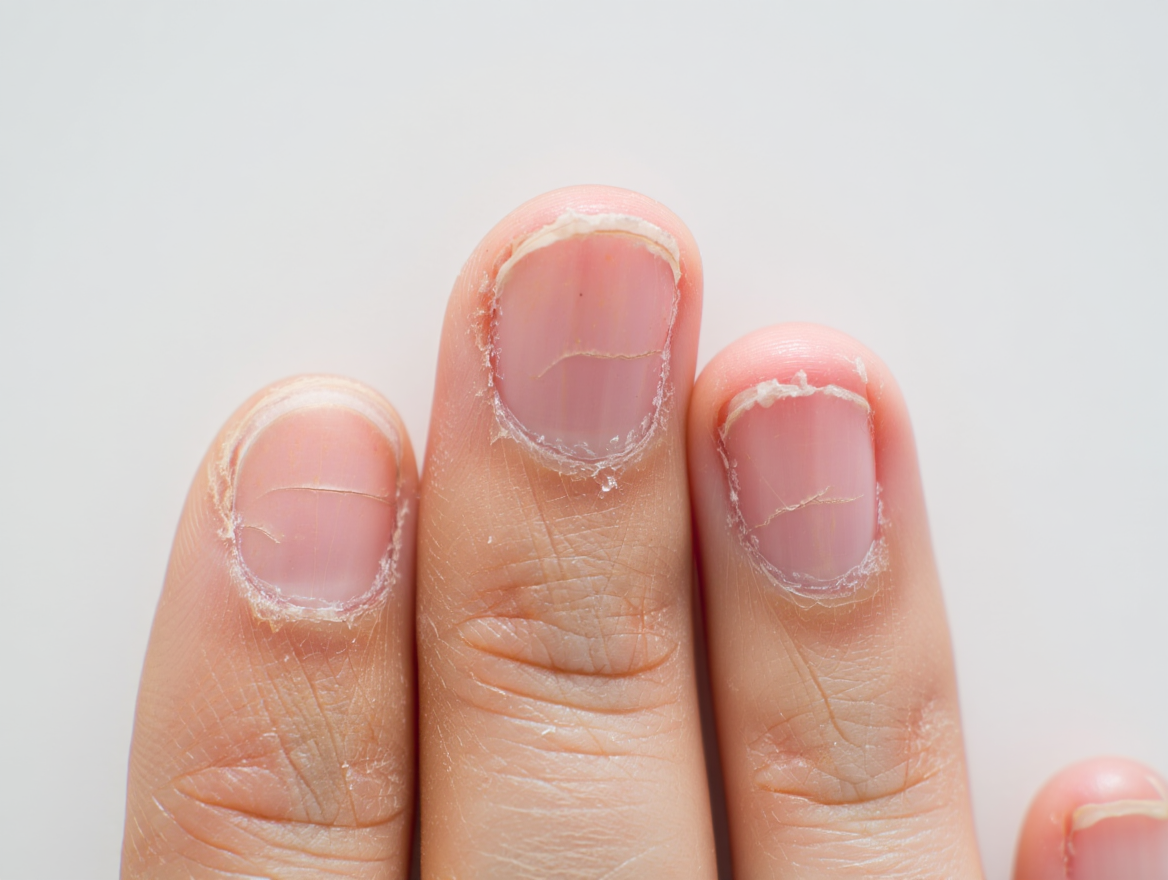
Symptoms to watch for
Identifying early signs helps pick the right remedy. Peeling layers at the tips signal onychoschizia. Horizontal splits mean repeated bending and dehydration. Vertical ridges are often normal with age but worsen with dryness. White chalky spots after gel removal reflect surface dehydration rather than fungus.
Pattern recognition: what the signs reveal
Peeling plus soft edges suggests overexposure to water and removers. Snaps at the corners point to squared shapes and side pressure. Recurrent hangnails imply poor cuticle care and friction. Persistent splitting despite protection may hint at an internal factor like low iron or thyroid issues. A well-built damaged nails treatment plan matches fixes to these patterns.
Simple checklist for quick triage
- Is there frequent wet work or sanitizer use each day?
- Are nails filed back and forth instead of one direction?
- Has there been recent gel or acrylic removal with aggressive buffing?
- Are cuticles trimmed or pushed excessively?
- Is there pain, swelling, or pus around the fold?
Common questions that arise
People often ask if a ridge is dangerous. Most ridges are harmless and respond to oiling and light buffing. Pain, heat, or swelling around the nail fold can indicate infection and needs medical care. If nails break despite careful habits, nutrition review and lab checks can help. A few months of focused brittle nails recovery can reveal whether diet or illness plays a role. Readers looking for a clear plan can use how to treat damaged nails as a simple checklist to follow week by week.
Brief wrap-up: use symptoms as a map. They direct attention to behavior changes, product choices, or professional help.

At-home recovery treatments
Home care works when applied consistently. The goal is flexible strength, not rigid hardness. Oils, barrier creams, and gentle shaping form the foundation. A core nail repair plan layers moisture, protection, and low-trauma grooming for steady gains.
Why home care changes outcomes
The nail plate is porous and responds to regular conditioning. Occlusive balms slow water loss and preserve softness. Phospholipid or ceramide-rich creams support the surrounding skin. A daily routine tightens layers and reduces peeling. That structure turns hydration for nails into lasting resilience rather than a quick shine.
“Because acetone can be harsh, drying, and damaging, less contact time means less harm to the nail plate, skin, and cuticles,” notes a Harvard clinician.
Italicized study insight: A Swiss study on brittle nails reported about a 25% increase in nail plate thickness with daily biotin supplementation, suggesting structural support for some patients (1993, Zurich).
Step-by-step routine for steady gains
Start with a short, rounded shape to reduce leverage on corners. File in a single direction from edge to center. Seal the tip with a final downward stroke. Apply a light oil to the plate and cuticle line twice daily. Follow with a rich hand cream after every wash. Wear nitrile or vinyl gloves with cotton liners for chores. Keep polish breaks where nails rest bare for one to two weeks between color cycles. This cadence supports how to treat damaged nails at home without constant salon visits.
Comparison table: common home options
| Method | What it does | When to use | What to avoid |
|---|---|---|---|
| Cuticle oil (jojoba, squalane) | Improves flexibility and sheen | Daily, morning and night | Flooding under gel or acrylic |
| 20% urea cream | Softens dry plate and skin | Nightly on bare nails | Using on infected skin |
| Petrolatum balm | Seals moisture after oil | After handwashing | Applying before polish adhesion |
| Acetone remover, brief use | Dissolves varnish quickly | Infrequent removal | Long soaks and harsh scraping |
| Fine-grit glass file | Smooths edges cleanly | Weekly touch-ups | Sawing motion back and forth |
Short summary: a consistent routine beats sporadic fixes. Build a rhythm and track chips, splits, and growth monthly to gauge brittle nails recovery.
Moisturize after every wash, then seal with balm—condition first, lock it in second, protect with gloves third.
Salon treatments (strengtheners, wraps)
Professional services can help in moderation. The aim is protection without added trauma. Strengthener base coats and breathable wraps cushion daily stress. A thoughtful damaged nails treatment plan picks the lightest option that maintains function. These choices complement how to treat damaged nails without inviting new damage from heavy buffing; explore gel and dip powder and acrylic options to pick the least invasive service.
How salon care supports healing
Base coats with crosslinking resins add temporary support. Silk or fiberglass wraps reinforce corners without bulk. Builder gels should be thin and expertly removed. Long appointments spaced several weeks apart reduce removal cycles. These choices complement how to treat damaged nails without inviting new damage from heavy buffing.
“Some people like the way trimmed cuticles look, but cutting this protective layer of skin increases infection risk,” says Erika Summers, MD.
Italicized study insight: A UC San Diego in-vitro study reported DNA damage and high cell death after UV nail dryer exposure, prompting sunscreen or glove use during gel curing (2023, San Diego).
Menu of salon options to consider
- Thin protein or resin strengthener under sheer polish for flexible support.
- Silk wrap on a single splitting corner to prevent further tear.
- Short, rounded shape with careful cuticle softening instead of cutting.
- Gentle soak-off with minimal scraping and quick acetone contact only.
Concluding note: seek a salon that documents ingredients and removal methods. A cautious approach pairs well with nail repair over months. Clients who want a simple mantra can remember how to treat damaged nails by choosing the least invasive service that still protects daily use.
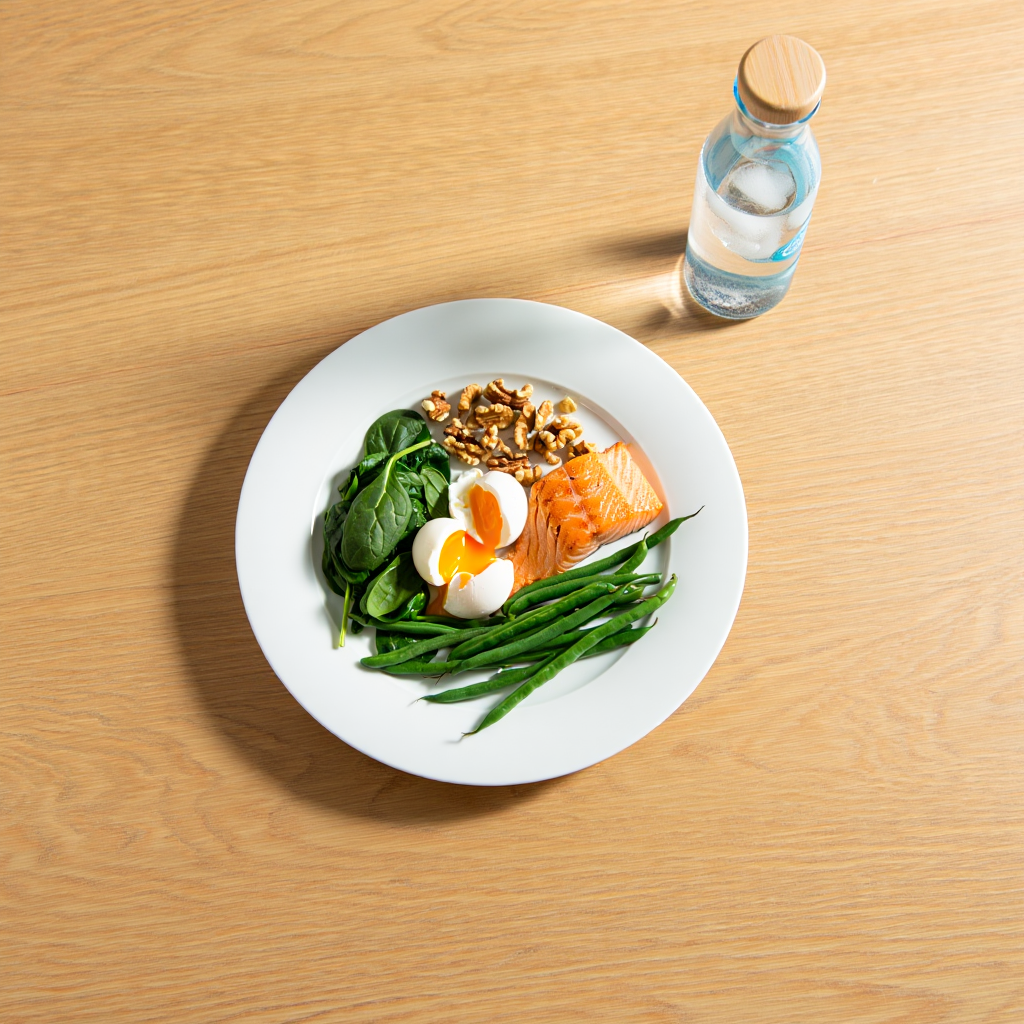
Nutrition & supplements
Keratin needs energy, amino acids, trace minerals, and hydration. Balanced meals usually cover those needs. Focus on protein, iron sources, zinc, and B-vitamins. Omega-3 fats may help skin around the plate. Supportive nutrition sustains how to treat damaged nails as growth replaces weaker layers.
Evidence and expert perspective
Biotin receives attention for brittle nails. Research is limited but suggestive. One Swiss series found thicker plates in many users after months of intake. Another study on choline-stabilized orthosilicic acid reported improved skin quality and reduced nail brittleness scores among women taking 10 mg silicon daily for 20 weeks. Italicized study insight: Randomized, placebo-controlled data showed perceived nail brittleness improvements with orthosilicic acid supplementation (2005, Belgium).
“Well-moisturized nail beds grow healthier nails that bend and flex instead of breaking,” reminds a board-certified dermatologist, matching diet with topical care and hydration for nails.
How to build a plate-friendly plate
Eat protein with each meal, such as eggs, fish, poultry, tofu, or legumes. Add leafy greens and beans for iron and folate. Include nuts and seeds for zinc and healthy fats. Hydrate with water across the day. If supplements are considered, discuss biotin or silicon with a clinician, particularly if taking other medications. A steady plan supports brittle nails recovery while new growth replaces older layers. Readers who want a quick anchor can return to how to treat damaged nails as a reminder that food and habits must work together.
Closing thought: nutrients help most when daily habits reduce external stress. Food cannot outpace repeated solvent exposure or rough tools.
Prevention: habits & tools
Good tools and small routines prevent setbacks. Prevention is cheaper than constant fixes. Consistent care preserves gains from damaged nails treatment and avoids the cycle of break, patch, repeat.
Habits that protect progress
File in one direction using a fine glass file. Keep shapes rounded to avoid corner leverage. Moisturize after washing and at bedtime. Rotate polishes with rest weeks. Skip cuticle cutting to keep the barrier intact. “Cuticles protect nails and the surrounding skin from infection,” states a dermatology association.
Choose removers with quick action but short exposure. Avoid metal scrapers under the plate. Store a pocket balm near the sink for quick re-application. Keep gloves by the dish rack to maintain hydration for nails between chores. People often ask for a single takeaway, and the clearest one remains how to treat damaged nails by protecting them from water, heat, and friction daily.
Tool setup and daily micro-routines
Place a travel-size oil in the car or bag. Add a bedside cream to catch the last application. Keep files in multiple spots to fix snags quickly. Mark a calendar reminder for polish breaks. These friction-reducing habits enhance cuticle care and keep edges smooth.
A brief wrap-up: prepare the environment so the routine happens automatically. Make the healthy choice the easy choice.
File smart, moisturize often, and protect with gloves—consistency beats intensity for long-term nail strength.
When to see a dermatologist
Some problems need medical evaluation. Painful swelling around the fold can signal infection. Durable pits or yellow thickening may reflect psoriasis or fungus. Sudden spooning can relate to iron deficiency. Medical review ensures how to treat damaged nails includes the right diagnosis.
Signs that warrant expert care
Persistent splitting despite months of care deserves labs and a closer look. A green or brown discoloration under a detached area needs culture. Chronic redness or oozing around the fold requires treatment. If gels or acrylics always trigger rashes, patch testing for acrylate allergy can clarify the culprit.
“Infections after manicures and pedicures can occur if precautions are not taken,” notes a dermatology professor.
Italicized study insight: A laboratory review flagged formaldehyde in some “formaldehyde-free” nail polishes, highlighting allergy and irritation risks with certain hardeners (2019, Cincinnati).
Risks of neglecting damage
Neglect breeds chronic fragility. Peeling edges catch on clothing and tear deeper. Recurrent swelling around the fold scars delicate tissue. Thickening or lifting can hide infection that spreads under the plate. Professional care keeps a small issue from becoming a long-term problem and ensures cuticle care stays protective rather than painful. For anyone unsure where to begin, a safe starting point is how to treat damaged nails with short shapes, gentle products, and calm removal methods.
FAQ
How to stop peeling if breaks keep happening after washing dishes?
Cut exposure with lined gloves during wet work. File tips in one direction and seal edges with oil and balm after drying. That routine supports how to treat damaged nails effectively.
Why do nails feel weaker after gel polish removal?
Buffing and long acetone soaks dehydrate the plate. Ask for minimal scraping and shorter remover contact. Use sunscreen or gloves during lamp curing and plan polish holidays for hydration for nails recovery.
What’s better for strength: hardeners or oils?
Hardeners give temporary stiffness but can over-dry with certain resins. Oils improve flexibility and reduce snapping. Many people rotate both with rest weeks to maintain nail repair gains.
How to tell fungus from surface damage?
Fungus often brings thickening, yellowing, and debris under the edge. Surface dehydration shows chalky white spots after removal. A clinician can test and adjust damaged nails treatment accordingly.
Why does trimming cuticles lead to problems?
Cuticles seal the gap between skin and plate. Cutting opens a path for microbes and irritation. Gentle pushing after a shower and daily oil supports safe cuticle care.
Before the conclusion, check out a relevant video with a real recovery story and a clear step-by-step plan for damaged nails treatment at home. The author shares tips, honest results after 30 days, and explains how to rebuild nail strength without expensive salon visits. This practical example lets you see that a consistent home routine for damaged nails really delivers.
Conclusion
A strong nail plan tackles causes, builds moisture, and uses the lightest tools possible. It pairs salon care with smart removal and calm shaping. It feeds the matrix with balanced meals and steady water. It sets reminders and places products where they will be used. Above all, it follows a rhythm that favors flexibility over rigid hardness. Use the steps here to guide how to treat damaged nails day by day, then keep the routine going as new growth replaces older layers.
Download the A4 checklist and pin it where you wash your hands. It turns small, repeatable actions into steady growth, reduces breakage weeks sooner, and keeps recovery on track without guesswork.